
Legions of Kadmon Diary #3 - First Time Prototyping
MORBIDIADESIGN DIARYGAME PUBLISHING
Joshua Dharmawan
6/14/202414 min read
This is by far, the most hectic moment throughout Legions of Kadmon’s development. Frankly, I think I should be thankful for it. Otherwise, this project might go on for another year.
I know at one point in this project’s tenure, I would need to reveal the game to the public. It was a matter of when and where. In an ideal scenario, I would want to perform my first public demonstration in a convention, a place near home (somewhere in South East Asia) and hopefully designed more for an Indie Dev. But when it comes to information about where and what conventions are being held, I am lacking. My mind was only set on a single convention: Gamescom Asia which are usually held annually in around October. So, I thought, “Cool, I still have some time to finalise the design of the cards and finish up with the missing illustrations. There was no need to rush a prototype or website.”
The world threw yet another curveball.
It Came Like A Storm!
If you had read my previous Developer’s Log, I mentioned briefly about meeting one of the creators of Lord of the Chords. Well, one of the outcomes of that meeting was an invitation to a WhatsApp chat group of Tabletop Game creators in Singapore. Most of the time, that group was sort of silent, but there were always incoming announcements of conventions that were happening nearby.
On April 25th, news came to me that there was a Tabletop Game convention happening on June 22nd, right here in Singapore. That very convention checked all my marks.
A Focus on Tabletop Games
A space for Indie Developers
It’s happening in Singapore
I remembered telling all my friends, “Holy **** dude, this is the perfect event.” It’s an even more important event than Gamescom! Okay… sure… but there’s one problem… I did not plan for this in my timeline!
It took me a while to consider. Should I rush this first demo? It is supposed to be a huge milestone for the project, and I cannot mess it up. Considering my usual schedule of doing this project 1 to 2 hours a day after my full time job, I was already dreading hitting my own deadline of October 2024. I mean… there is just no way… it’s impossible to create a good-looking website and the perfect prototype in 2 months! Furthermore, I told my artists of a sparser, more lenient timeline for them to work with. Yikes, one of my artists could only begin work at the beginning of June! Oh man, this is a mess.
Reading books was one of my favourite things to do in my free time. In one of the books I read, titled ‘No Is a Four-Letter Word: How I Failed Spelling but Succeeded in Life’ by Chris Jericho (yes, the wrestler), I recalled one rule Jericho had written in his book. Find a way to make it work. So, that’s what I told myself. There has to be a way to make this work!
As per the ‘do first, think later’ mentality (one of the most valuable things my life mentor had taught me, albeit being very risky), I registered for a booth first and I’ll figure out how to solve the ‘game reveal’ issue. I know that, at least, the pressure would urge me to definitely make this work. Somehow.
Setting a Reasonable Scope
The first question I asked was: Why did I believe that it won’t work? There’s a few answers to that.
Not all the illustrations are finished. In fact, not all of the character briefs are finished…
Your dream website is not done!
Your game has no model, you have no idea how it’ll look like as a product!
The card design you made looks ugly and doesn’t do the illustration justice!
DUDE! YOUR GAME HAS NO TITLE DESIGN / ICON / BRAND!
Alright cool. Let’s see what we can do in 2 months. Divide the issue into smaller pieces and solve it one by one. As usual. No big deal.
Not all the illustrations are finished. Not all the character briefs are finished. But is the game playable without them? Yes, it is. In fact, in a demonstration or trial, showing a simplified version of the game might be more lucrative. We can cut down session time, and more people can try the game throughout the course of the convention. Oh wow, one problem solves the other! But what about VERY important pieces? Like… the pieces of Samael. This is one of those moments where I have to make some sacrifices to make work. I wrote an email to my artist working on the Samael pieces, and I asked if he was willing to do a little ‘crunch time’ for me. Of course, I have to pay him extra, but if he could make it before the event, that would be worth it.
Your dream website is not done! Well yes, and it will never be! It’s a dream! I told myself not to be a perfectionist. The website has to be completed a month before the event, and it has to be at least marketable. By marketable, I mean, pretty enough for people to visit and look around. Awesome enough for people to see Legions of Kadmon as the real deal! Alright, I can do that. I listed out the things to include: Simplified Rules, Subscription Button, Cool Artwork, Core Character Profiles, and Card Image Gallery. Instead of the full lore about Morbidia and the extensive stories of all the Legendary, I took a step back. Already, the website looks way more doable.
You have no model. Let’s figure out how a board game is made first! Read up on it during my commutes. Ask around! We’ll figure it out!
Card Design and Game Title. Another time to call one of my artists, one I know is a miracle worker. I had to rearrange her workflow a little to make sure that the more important assets are done first before anything else. Icons? Push it back. Map of Morbidia? Push it wayyy back. First, Game Title so that I have something to start the game’s social media with. Then, the card design.
Website and Assets
Alright, now that we had a clear goal on what to do until 22nd June, and I’ve assigned tasks to others involved. I’ve got to take the rest of the matter in my own hands. First of all, the website. I’ve got to admit that WordPress may not be the best platform to create a landing page like these. If I had enough time, I would have spent more time doing research on which platform would suit my needs better. But, I don’t. And I had to rely on my experience. I’ve written blogs on WordPress before, in fact, I still have my own WordPress website where I write about the works that inspired me. So I decided to go with the platform that I am most comfortable with.
I went around the internet looking for references. I checked out websites done by other local Indie developers, but none of them fit the mood I was trying to capture. I went back to the game’s roots. What inspired this game? TCGs and a particular game called Unstable Unicorn. Looking through their website gave me a better idea on what I wanted. In particular, Flesh and Blood TCG helped me out a lot to find my ‘voice’ in the current website design.
Designing the website, I started with structuring the pages I needed to include (mentioned above). I think of it like building an outline for a book. Structuring the pages allowed me to better envision how my website would flow from one page to the other. I made a little mistake at first, thinking that I could treat my pages as a post but in its core pages and posts are completely different. So… if there was something that I learned from building this website, it was the difference between a page and a post. AHAHAHA.
If you look around the website, you’ll see different Assets being used: Page Divider, Featured Images, etc. If those don’t look as good as the illustrations, I hope you’d understand that I made those myself using whatever Photoshop knowledge I have. I’d say that a more experienced person would be able to do these assets with more expertise at a faster time. But unfortunately, that would incur extra cost for me, and more importantly, finding the right person would’ve taken me a lot of time.
I have to admit. I am extremely thankful that on top of my passion for creative writing and my expertise in coding, I had the opportunity to work closely with design tools like Photoshop and After Effects during my University days. Without those experiences, I would’ve struggled creating these assets.
Online Resources
So, how do I prepare assets that I have no idea how to create. To narrow it down, I am referring to the Game Components Design and printing. Honestly, I was quite impressed with the amount of resources you can find online. If you type in your google search bar ‘Make Board Games Prototype’ there are a lot of videos explaining how to make board games. It means that there are A LOT of ways to go about doing it, each with a varying degree of marketability.
For example, for a closed test, you can home-print paper cards and paste it in existing spare Trading Cards you find at home. Sleeve it and you’re ready to go. If you need a foldable board, use a cheap table cloth instead. If you need a box, you can find plastic containers or spare paper boxes in online stores like Shopee or Lazada.
But what if the scope of the test is much larger? What if what you’re trying to create is meant to be ‘sales-viable’?
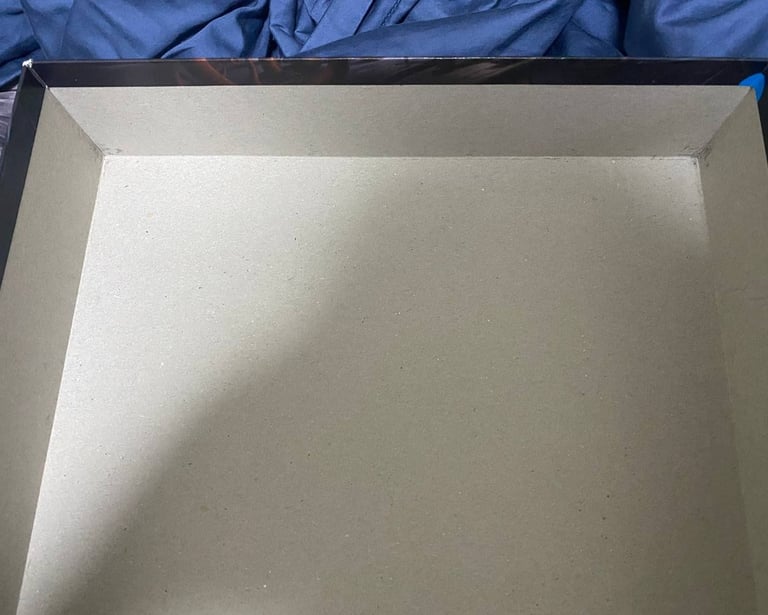
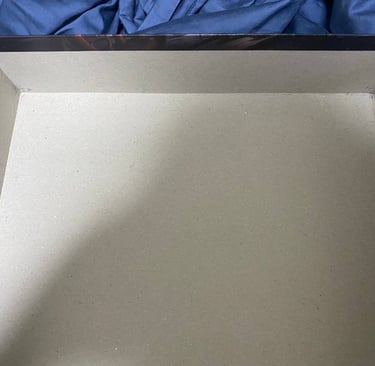
From those home-made prototype videos, you can learn the manufacturing concept of each component. The boxes you see in your board game stores are actually a plain chipboard box with a printed image pasted on it.
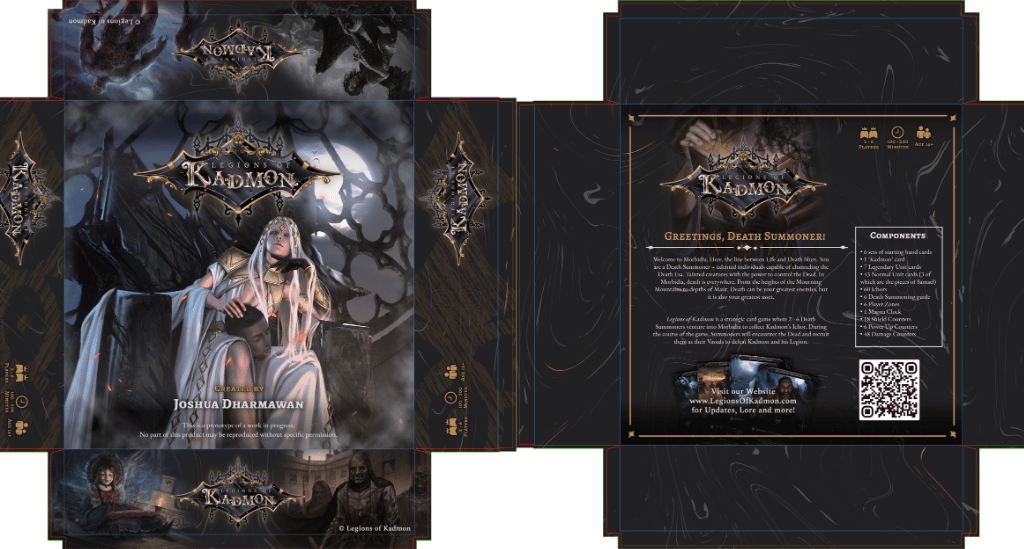
Cool, now I know how it's being manufactured. So now, onto finding a template for which I can work on. And when I looked for a template, I encountered the website: https://www.boardgamesmaker.com/ which also provided printing services. PERFECT! I can work with this. I downloaded the template for a 12.5" x 12.5" x 3" box and began to work with Photoshop once again.
Magical, isn't it?
Through their website, I also found more templates on different game components. Which led me to start designing the rest of the components needed for ver 0.8.1. Soon, I've got all the designs I need and I sent them away for printing.
What's next? I need to perform a reveal! But how am I supposed to do a reveal without the model ready? I can wait for the product to finish printing, and I can take pictures of it the traditional way. But that would cut way too close to the event's date and I am not too comfortable with that. I needed a digital model somehow.
Then, it occurred to me. The way board games are manufactured (images printed on a board), they reminded me of how textures work in 3D models. My colleagues in my workplace taught me that! That's it, I just need to treat the images I created in Photoshop as 3D model textures.
I was reminded of those days I spent doing my Final Year Project in University. I had the chance to play around with Blender. I asked myself, "How do I create a 3D model of my board game box in Blender?" Google it! And I found this excellent guide from Kagan productions.
Not only does this video show me a step by step method on how to do exactly what I want. It also taught me how to apply textures properly using Blender's Mapping and Texture Coordinates. The best part is that the very same concept can be applied to the rest of the game's components EASILY. Rinse and repeat, apply it to the cards, apply it to the tokens, I got myself a beautiful 3D model.
After this experience, I am a believer that anyone can learn anything online. All it takes is some time to read about it, and the knowledge of what to look for. Perhaps it won't turn you into an expert, but to make your product look marketable, online resources are more than enough!
First Print
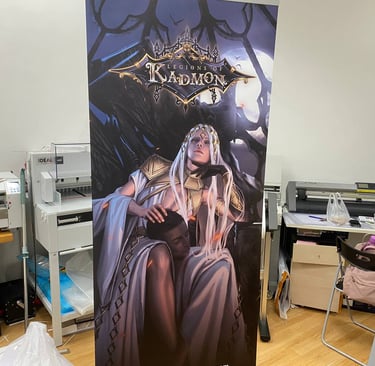
Many things have to be printed to make our booth look good. I've always been a fan of pull-up banners. I used to work for a Gaming club back in my University days. We would organise various gaming tournaments and other events. In these events, we will always have a flag-bearer. Their responsibility was to carry a pull-up banner (which we considered a flag) to various events. This banner served as an invitation to our brand, and throughout its tenure, it had successfully garnered us a lot of members and media attention. Remembering the good ol' days as a flag-bearer, I figured that Legions of Kadmon would need some pull-up banners too. And considering that the artwork was one of this game's greatest strengths, I knew we could have some excellent banners coming into the event.
I chose not to over-design this. I want to highlight the art, so I simply put the game's logo up on top, and website down below. The rest of the banner is all about the artwork. I want Kadmon to stare down at the people coming into the conventions. I want everyone to be enchanted by his gaze.
During my trip to collect the pull-up banners, something incredible happened. When you came to collect banners like these, the printers would deploy it. It is to check if the customers are satisfied with the product. It was also to make sure that there was no damage or misalignments to the prints. When the banner unfolded, that marked the first time I've ever seen Kadmon in a non-digital form. And as I stared in awe, everyone inside that printing shop did too. Doesn't matter if they were customers or the printers, they stood there and feasted their eyes on Kadmon's presence. One of the best moments I ever experienced in the course of this project. And it could never happen if not for the beautiful illustration Spearthymint made for me.
DIY is Needed
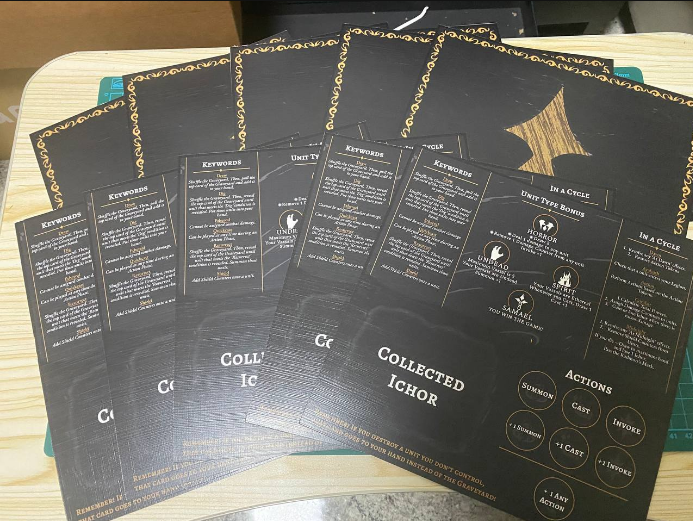
While I managed to send the box and tiles away for printing, I couldn't do so for the cards and player guides. Both of these components have designs that were incomplete. The player guide was my own attempt to structure the phases + actions in a more Player-oriented manner. I did the design myself and I could foresee some complaints coming my way with this particular component. I'm prepared to fix those after the first demo!
Preparing the Player Guide prompted me to use some chipboards that I could find in the local art store. I would then print the top and bottom half of the component on a 250 GSM Linen-Finish paper. Then, I cut them myself using a box cutter and pasted them over the chip board using Elmer's. The result was a slight mess, but a working component. I thought that it turned out better than I had expected, but definitely not comparable to the industry standard. Well, I just hope that it's not too visible during demos... and if it is... I apologise.
Not everything turned out great though. About a month and a half before the convention, I had the option to use older card designs and send it away for a card manufacturer to print. Or I could let my artist polish the card design for another 1 or 2 weeks and print the cards locally. I chose the latter. The old design for the cards are not up to my standard. Furthermore, having a low batch manufactured would be quite cost-ineffective.
During this time, I thought that printing cards wasn't a difficult thing to do. After all, they were just paper cut into a 63 x 88 mm dimension, right???
Sigh...
As my artist was working on a newer and better card design, I explored the local printers down in Sunshine Plaza. I went to the same printers that printed my pull-up banners, for which they said that printing double-sided cards like these are impossible. I was shocked and when I asked why, they said that having borders in the card design makes cutting it evenly impossible.
That's absurd! I mean look at other TCGs out there. Every single card has a border!
So, I thought, "Perhaps it is something about printing on a double sided paper." After all, it is difficult to align two printed sides together and cut them with precision. I went home that day thinking that there might be some knowledge gap that I needed to fill. How exactly are cards produced? I went back to studying and reading, this time I looked up how a MTG card is printed.
It turned out that cards are manufactured in a very specific way. It is essentially a sandwich of cartons. You start with one side of your card printed on a paper and coated it with some kind of a varnish. Then, the other side will be printed on a separate piece of paper, likewise, coated with a varnish. Then, the two papers are attached to each other using an adhesive known as a core.
In a similar fashion as the game's box, I thought, let's replicate this! When the card designs were done, I went back to the printing shop with a huge determination. I was certain that I'd nailed it. When I told the printers how I wanted it printed, they told me yet again, "I'm telling you, it's impossible."
What? Why?
She went on to print me a sample. One side of the card and immediately cut it to my desired dimension. There was a HUGE margin of error. My heart sank and I asked them yet again, "why is it not possible?" She went on to once again talk about the borders and how the card is badly designed. Again, I wasn't convinced. Most cards have borders. And if there was something wrong, it definitely has to do with how the paper is cut, or how it is printed.
With a little spite, I thanked the printers and left to find another. There had to be someone else who could pull it off. It's paper cut into 63 x 88mm, why is it so hard?
The next printer I approached seemed to understand my situation better. I did ask if it's possible to print the cards double-sided and she did say that it was going to be difficult. But regardless, she gave it a try. The misalignment between the two sides was present and was clearly visible. I expected it and I wanted to tell her that we could do a single-sided print instead. She insisted on trying a double-sided print, however, and I had to wait an hour for her to experiment with alignment. I was impressed by the amount of effort she put in, but alas, it wasn't possible to perfectly align a double-sided print.
Instead, we decided to go with my original plan of printing them single-sided and I'd have myself paste the two sides together at home. This time, the cut went according as planned and I managed to get myself 63 x 88mm cards without much of an issue.
I continued with the work at home, pasting the two sides of the card together with ol' reliable Elmer's. Of course, this quality is far from the industry standard. I hope that I can get this fixed for future demos as I polish the game further.
Afterword
Lots of ups and downs as usual, but this had been one of the most thrilling experience I had so far. Would this constitute premature preparation for a product? You can think of it that way. But I do believe that if I didn't try to catch TableCon, who knows how long would the development of the game dragged on. In the end, what justifies these series of 'rushed' preparations is what do the public think about the game.
Share


Using stories to inspire you to brave the storm.
QUICK LINKS
© 2026 STORMBRAVER / Joshua Dharmawan. All rights reserved.

